

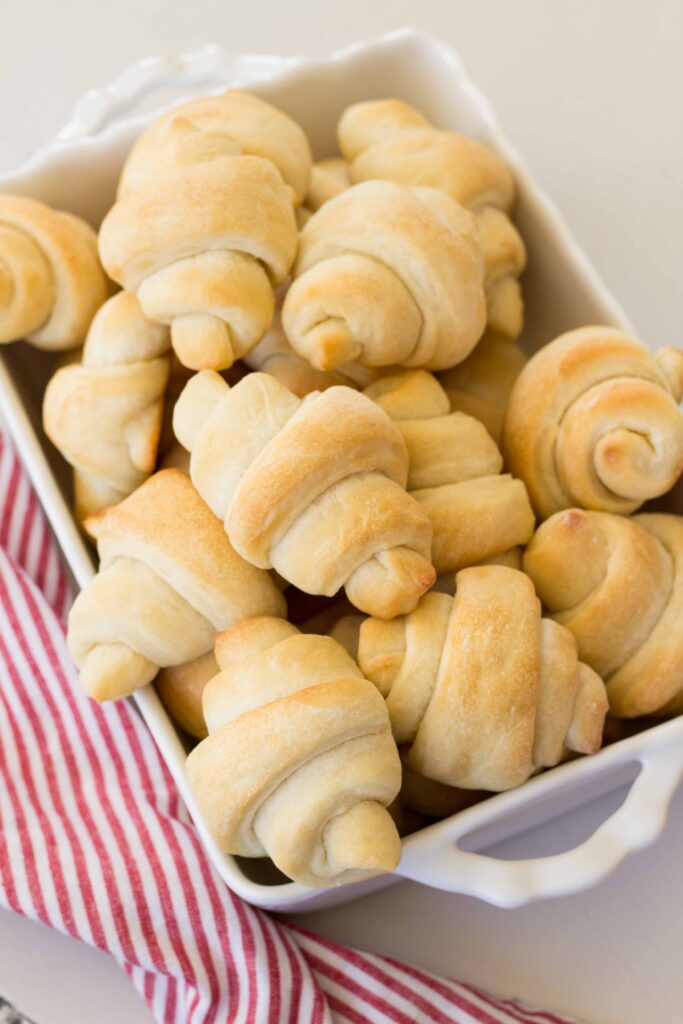
Looking for the perfect soft, fluffy and beautiful dinner roll to make this holiday season? Look no further!
Some recipes are just special. I’m proud to say this very delicious recipe was born from pure experimentation, and this simple recipe is one I return to again and again because they always come out perfect!
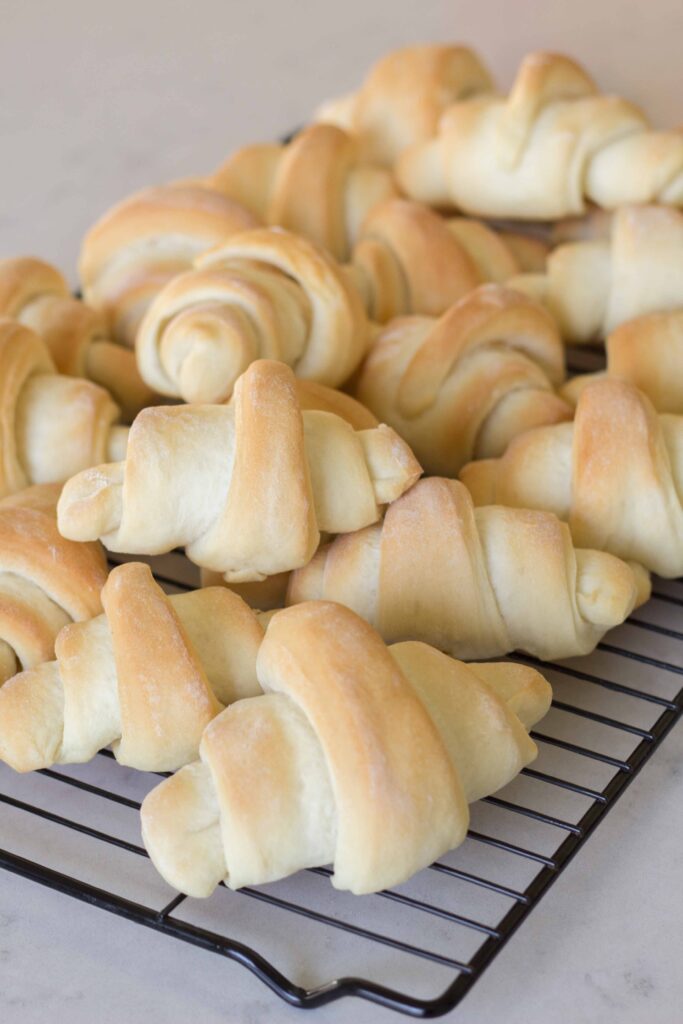
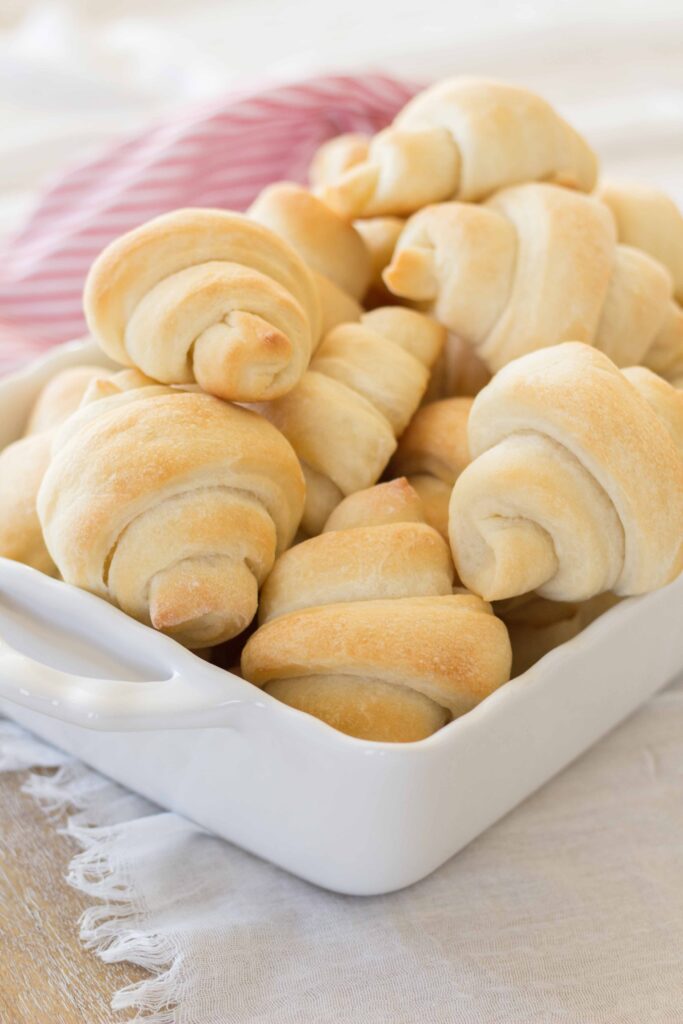
These dinner rolls disappear fast at gatherings or even when I make them to go with our dinners. Enjoy them fresh out of the oven with butter or jam and WOW, they melt in your mouth!
If bread-making makes you nervous, fear not! This is a really fun recipe to follow, and just takes a few basic steps. A kitchen Aid mixer is not required for this recipe but is very helpful because of how well it incorporates and works the dough.
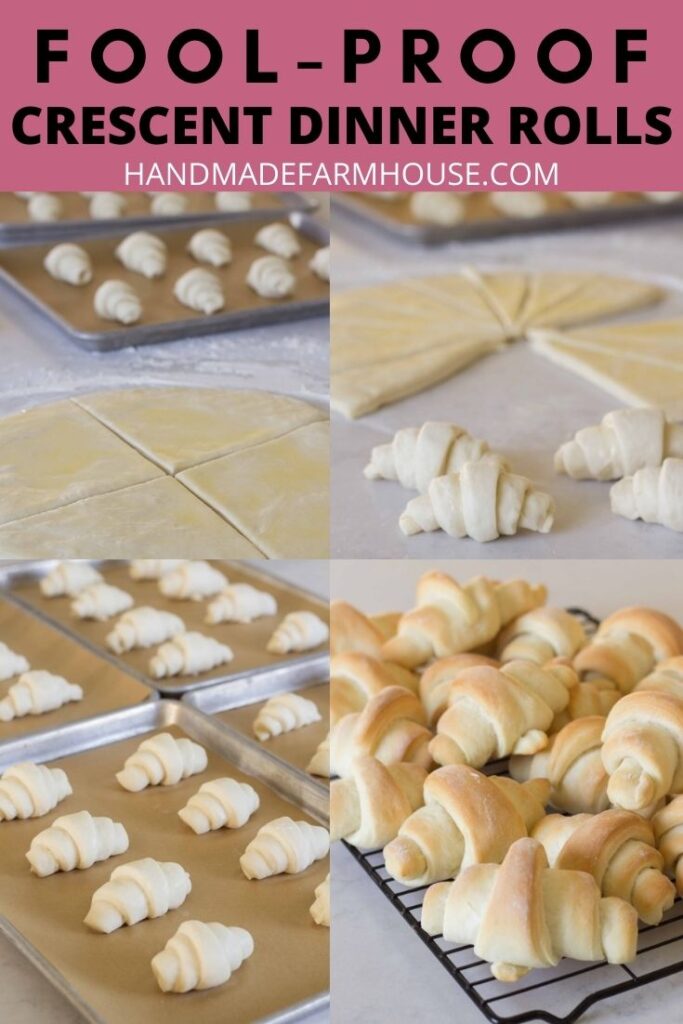
The process for fool-proof cresent dinner rolls:
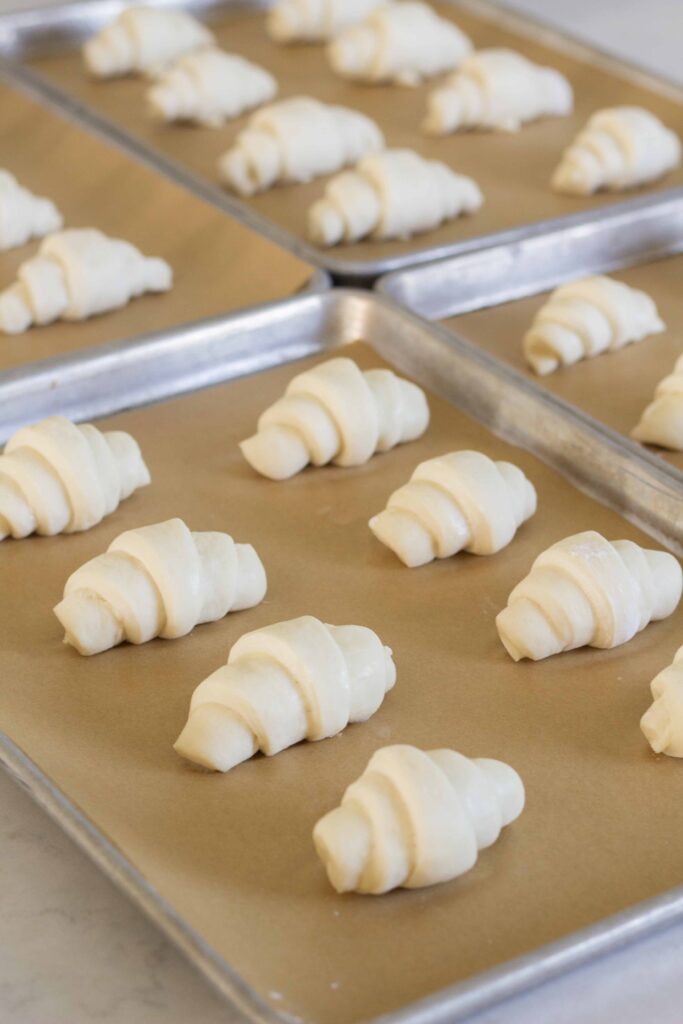
This roll making process just takes a few steps! After allowing your dough to rise you will cut it in half and roll it into two 15″ rounds. Use a pizza slicer to slice each circle into 16 even pieces.
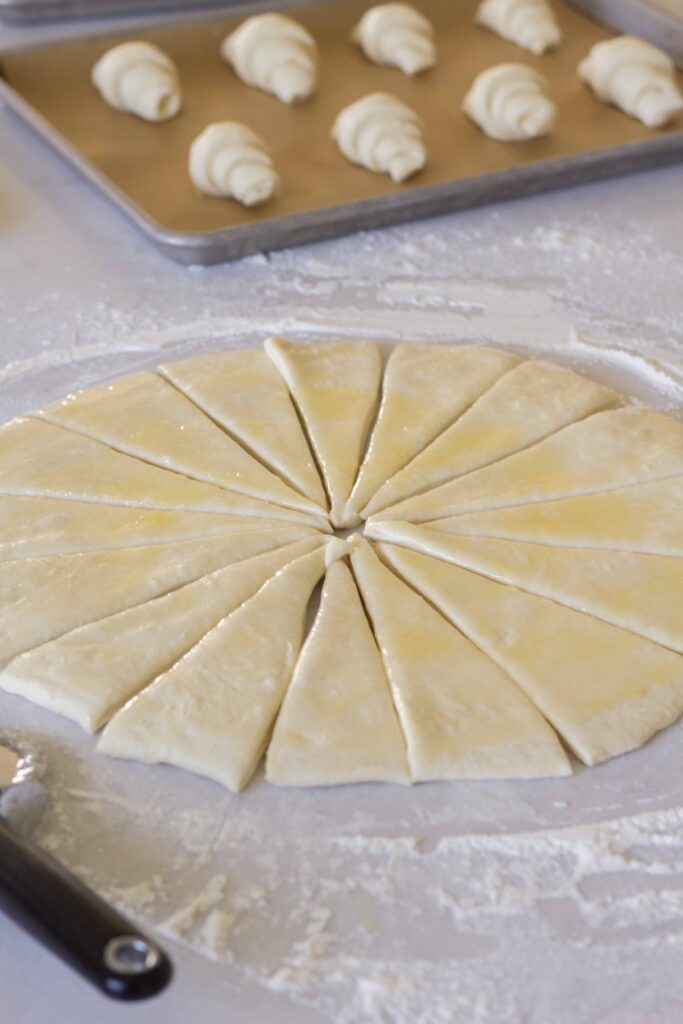
Brush your rounds with melted butter and allow it to slightly set. Now roll your triangles up from the large end to the small, making sure to end with the tail under.
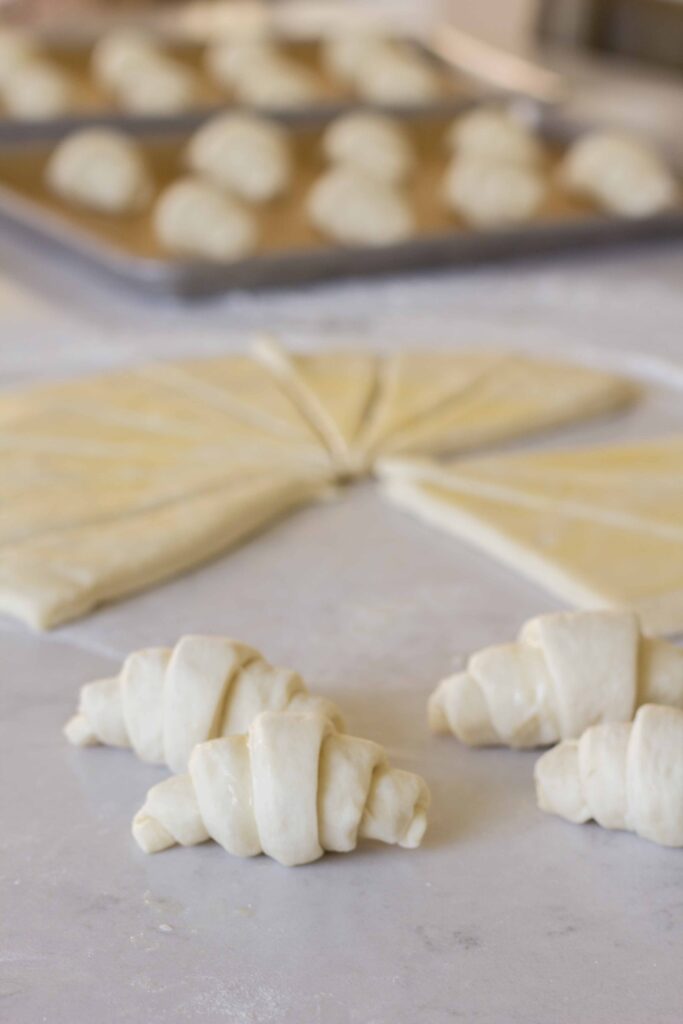
Allow rolls to rise for 25 minutes before baking. I love using these parchment sheets for all my baking! I highly recommend parchment.


Equipment
- Kitchen Aid mixer
- Baking Sheets
Ingredients
- 2 Tablespoons Instant Yeast I love using SAF brand (I keep it in a baggie in my freezer after opening)
- 1/2 cup warm water
- 2 cups HOT water
- 5 Tablespoons vegetable oil
- 1 Tablespoon kosher salt
- 3 Tablespoons sugar
- 6 cups All-purpose flour (can sub in 2 cups bread flour if desired)
- 1 stick salted butter for brushing Melted
Instructions
- In your mixer bowl add 1/2 cup of warm water and 2 tablespoons yeast. I like to add a pinch of sugar in just to encourage the yeast to activate. Mix and allow to foam and activate for 5 minutes.Meanwhile, in a separate bowl, add hot water, sugar, salt, oil, and 2 cups of flour. Mix well. Once the yeast mixture is foamy, combine the two mixtures. With mixer turned on to medium speed, add remaining 4 cups of flour (I like to switch to my dough hook for the last two cups).Be sure to allow time for the mixer to incorporate all of the flour so its smooth and elastic. (It will seem like a wet dough still and that's okay! Leave dough in your mixer or pour it into a large bowl sprayed with cooking spray. Cover with a clean kitchen towel and allow to rise for 20 minutes. Use a wood spoon or just turn on with dough hook if its still in the mixer to deflate dough by turning 2-3 times. Repeat this step twice more so your dough has a total of 60 minutes rise time with 3 folds (to deflate).Dump dough onto lightly floured counter. Cut in half. Roll each half into a 15" round. Spoon melted butter on the dough and spread it around (like you would with pizza sauce). I like to give it a few minutes before slicing to allow the butter to slightly set. Use a pizza cutter to slice 16 equal triangles. I like to slice a cross and then go from there to make them even. Roll each triangle from the large end to the center, making sure the end us tucked under the roll.Place rolls on a baking sheet lined with parchment paper (you may also use non-stick spray but parchment is always my first choice). *Update: You can bake 16 rolls per baking sheet in 4×4 rows!Allow rolls to rise for 25 minutes before baking, this helps them be plump and airy!Preheat oven to 375° and bake rolls for 17-20 minutes or until slightly golden. Brush with butter while hot (if you're serving them right away). Rolls may be made ahead and frozen. They are wonderful! Just allow them to come to room temp before warming for 30 seconds in the microwave before serving. Rolls can be stored in a gallon ziplock and stay good for 1-2 days. If you're serving them for dinner the next day, I would still recommend freezing for freshness even if its just overnight.
Notes
SHOP THIS POST:
These dinner rolls are the perfect side dish for the holidays! I love bread that has a chewy texture with a buttery crust, yum. We like to enjoy ours with butter or jam. I know you will love them!
If you are considering learning how to make bread, you might consider checking out these other posts:
- Get bread yeast right every time
- Artisan Bread: the easy way
- The best homemade hoagie rolls (this is one of my most popular posts on pinterest!)
- My favorite French bread
Love this recipe for fool-proof crescent dinner rolls? PIN IT!


There’s nothing quite like a perfectly baked roll for Thanksgiving! Thanks for the recipe!
They turned out great. They were easy to make and they tasted great my family loved them. Thank you fir the great recipe. 5 stars
Dawne, Thank you so much for your kind feedback! This made my day. I love hearing that your family liked them. Happy baking!